Whether you’re new to wearing contact lenses or you’ve had them for a while, removing them can sometimes feel intimidating. But with the right technique and a little practice, you can learn how to remove contact lenses and become a confident contact lens wearer in no time.
There are many types of contact lenses, but they generally fall into two categories: soft contacts and hard (rigid gas-permeable) contacts. The method of removing contact lenses varies depending on the type you wear.
While your eye care provider will give you detailed removal instructions during your contact lens fitting, having a handy reference can be helpful. Read on for a step-by-step guide on how to take out contact lenses (both soft and hard) and learn extra tips for a smooth removal process.

Before taking out contact lenses
Before removing your contacts, it’s important to be well-prepared. Just like when putting in your contacts, having everything ready will make the process smoother. Follow these helpful tips:
- Gather your supplies – Ensure you have a clean contact lens case, contact lens solution, and any removal tools (if needed) within easy reach.
- Wash your hands – Wash your hands with soap and water, then dry them thoroughly with a clean, lint-free cotton towel.
- Choose the right setting – Standing or sitting in front of a mirror in a well-lit area can make removing contact lenses easier.
- Clean your lens case – Remove any leftover contact lens solution from your contacts case. Clean the case thoroughly and let it air dry upside down, or dry it with a clean cloth or paper towel.
- Place a towel nearby – Set a clean paper or cloth towel in the sink or on the surface in front of you in case you accidentally drop a lens. This helps prevent it from going down the drain or falling onto the floor.
Try to relax! Once you get the hang of it, incorporating contact lens wear into your daily routine will be effortless.
How to remove soft contact lenses
When you’re prepared and you’ve gathered your supplies, it’s time to take out your contact lenses. The following steps can help you master the process:
1. Look straight ahead or slightly upward
Focus on your reflection in the mirror or look slightly up toward the ceiling. Looking straight ahead or upward may be more comfortable than looking directly at your fingers while removing your contacts.
2. Hold your eyelids open
With clean, dry hands, use the fingers on your non-dominant hand to hold your upper eyelid open. Use the middle finger of your dominant hand to gently pull your lower eyelid down. This helps to keep you from blinking when taking out your contact lenses.
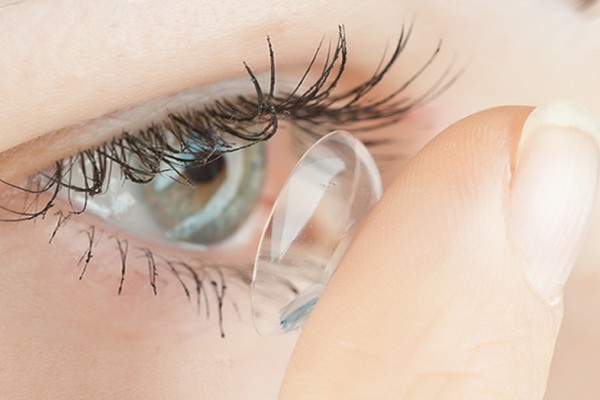
3. Gently pinch the lens to remove it
Place the pads of your index finger and thumb (on your dominant hand) on the lower portion of the lens. Gently pinch the lens and carefully lift it off your eye.
Alternative method
If you’re uncomfortable with the pinching method, there is an alternative approach. While looking upward, use your index finger to gently press on the lens and move it toward the white part or outer corner of your eye. From here, you can try the pinch method or slide it out of your eye completely.
4. Repeat the steps for the other eye
Once you’ve removed the contact from the first eye, repeat the process for the other one. It’s helpful to start with the same eye every time to avoid mixing up your lenses.
5. Clean or dispose of the lens
If you wear daily disposable contacts, throw them away after removal. Do not attempt to reuse contacts designed for daily use. If you have weekly, monthly, or other types of extended-wear contacts, you’ll need to clean and store them properly each night.
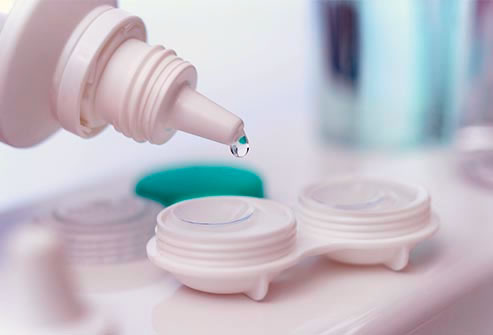
6. Store the lenses in a clean case
Place reusable contact lenses in a clean case filled with fresh contact lens solution. Never reuse old solution or “top off” what’s left in your case from the last use.
Follow your eye doctor’s instructions on cleaning your contacts after removal. They can recommend the appropriate solution for your specific lenses.
How to remove hard contacts
Some steps for removing hard contact lenses are the same as those for soft contacts. However, the actual removal process is a bit different, and there are a few different ways of approaching it:
The two-finger technique
- Look at your reflection in the mirror or direct your gaze straight ahead.
- With the middle finger on your non-dominant hand, pull your upper eyelid toward your eyebrow.
- Use the middle finger on your dominant hand to pull your lower eyelid down.
- Beginning at the outer corner of your eye and moving inward, carefully bring your upper and lower eyelids together to push the lens out of your eye.
- Repeat these steps for your other eye.
- Clean your hard contact lenses per your eye doctor’s recommendation and store them in a clean case filled with fresh solution.
The blink technique
- Position yourself in front of a mirror and direct your gaze straight ahead.
- Open your eyes wide until you can see the upper and lower edges of the lens.
- Gently but firmly, use two fingers to pull the skin on the outer corner of your eye toward your ear, making it taut. It helps to place one finger on the upper eyelid and the other on the lower eyelid when doing this.
- Slowly blink your eyes. The pressure from your eyelids coming together should dislodge the contact lens from your eye’s surface. You may have to blink a few times for the contact to pop out.
- Repeat these steps for your other eye.
- Clean your contacts per your eye doctor’s recommendation and place them in a clean lens case filled with fresh solution.
The blink technique can cause the lens to fall unexpectedly. It’s especially important to have a cloth or towel in the sink or on the surface in front of you when using this method.
The plunger technique
While other removal methods are often preferred, there is a third way to take out a hard contact lens. This method involves a small removal tool called a plunger (or DMV device). You may find this more appealing if you have difficulty removing contact lenses with your fingers.
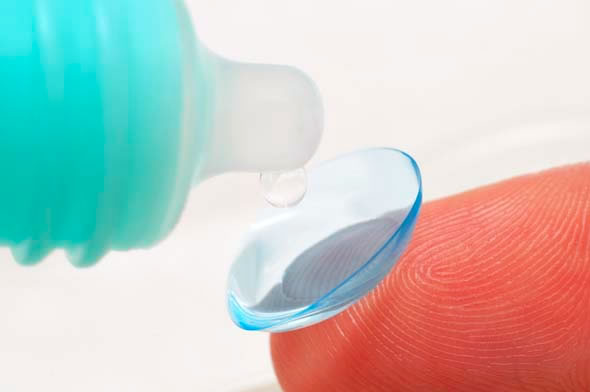
- Place a small amount of contact lens solution on the curved end of a clean plunger.
- Position the plunger on the lower third of the contact lens to create suction. Avoid placing it directly in the center of the lens or on your eye.
- Using the plunger, gently lift the contact up and away from your eye.
- Press on the plunger’s handle to release the lens into your palm or lens case.
- Repeat these steps for your other eye.
- Clean your lenses per your eye doctor’s instructions and store them in a clean case with fresh solution.
When using this technique, avoid touching the surface of your eye with the plunger, as this could injure or damage your eye.
Tips for contact lens removal
With practice, removing contact lenses can become second nature and a routine part of your day. But following these extra tips can help make the process a bit easier:
Use dry hands and fingers
Before attempting to take out your contact lenses, ensure your hands and fingers are completely dry. This will help you get a better grip and prevent your fingers from slipping off the lens.
Keep your nails short and trimmed
Long nails can make it difficult to handle contact lenses, while jagged nails can tear or puncture your contacts. Keeping your fingernails short and smooth makes contact lens removal easier and reduces the risk of damage.
Use a gentle touch
Avoid pinching or gripping your lenses too firmly, as too much pressure can tear or damage the lens material.
Start with the same eye every time
Get into the habit of taking out your contacts in the same order each time (such as the right eye first, then the left). Doing so helps prevent mixing them up, which is especially important if your lenses have different prescriptions.
Use the right solution
Never use tap water to rinse or store your contact lenses, as it can contain microbes that could harm your eyes. Ask your eye doctor to recommend the best solution for your specific contacts.
Remove your contacts before your makeup
It’s best to take out your contact lenses before removing your makeup. Be careful not to let your lenses come into contact with any makeup products as you take them out.
Clean your contacts immediately
Always clean, disinfect, and store your contacts right after removing them. This helps reduce the risk of bacterial buildup, eye infections, and other issues that could affect your eye health.
Contact lenses offer a convenient, effective option for vision correction. However, it’s crucial to follow your eye doctor’s instructions for proper contact lens care and wear. Consult your eye care professional right away if you’re struggling to remove contact lenses or you experience eye pain, redness, or other concerns.